
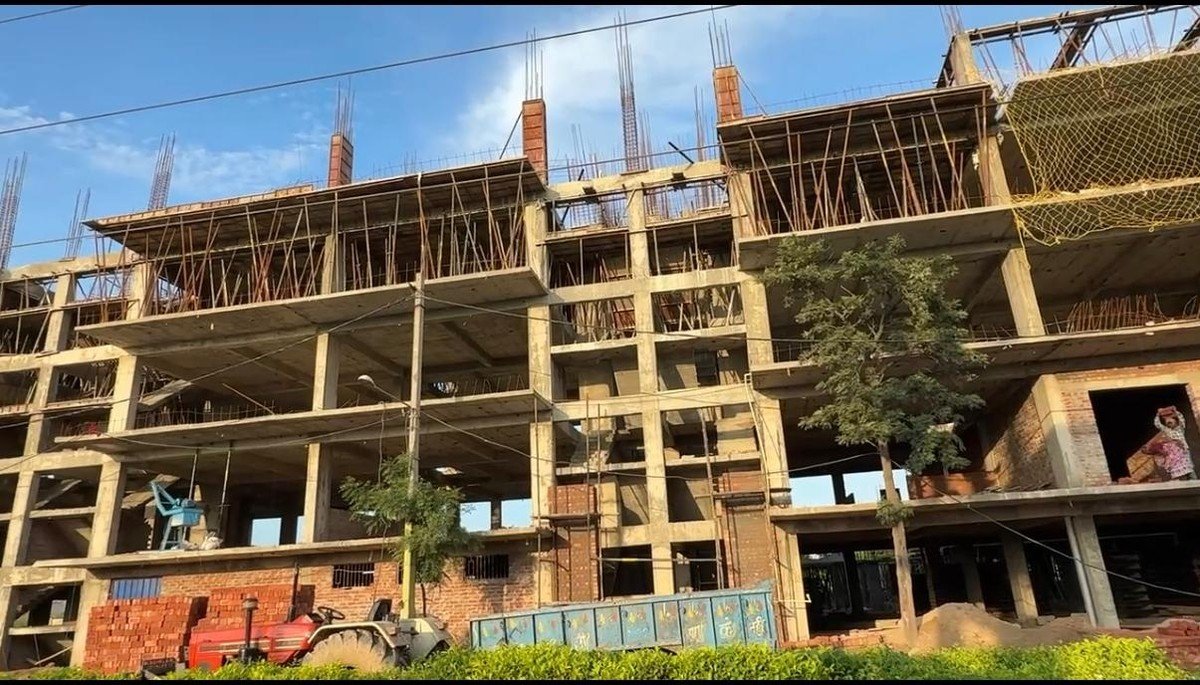
In residential building construction, casting an RCC roof slab (छत की ढलाई / लेंटर डालना) is the single most critical, high-stakes milestone of the entire project. Unlike brick masonry, plastering, or flooring—where minor defects can be chiseled out and patched later—a concrete roof slab is completely irreversible once cast. Once the cement slurry begins its initial setting cycle (within 30 to 45 minutes of mixing), any structural mistake—a sagged support prop, missing rebar cover blocks, a displaced electrical conduit, or segregated aggregate—becomes permanently locked into the core skeleton of your home.
Field studies across Indian housing sites reveal that over 65% of residential roof slabs develop visible shrinkage cracks, ceiling dampness, sagging (excessive deflection), or hollow plaster spalling within the first 3 to 5 years. In nearly every instance, the failure is not caused by substandard cement or steel; it is caused by the absence of a systematic, engineer-led inspection checklist on the day of casting.
This comprehensive, field-tested guide provides an exhaustive 28-point inspection checklist governed by IS 456:2000, IS 1199, IS 14687, and IS 2502. Whether you are an independent homeowner supervising a petty contractor or an engineer executing a multi-storey deck, use this exact protocol before, during, and after casting to guarantee an unyielding, crack-free, water-tight concrete slab.
Core IS 456 Quality Benchmarks at a Glance
IS 456 Cl. 6.1 permits M20 minimum; M25 is strongly advised for weather-exposed roof decks.
Factory concrete cover blocks at 1 per m²; never use broken brickbats or wood chips.
14 days for OPC cement; minimum 21 days for PPC or fly-ash blended cements under 50mm water.
Spans up to 4.5m require 7 days; spans over 4.5m require 14 days minimum before prop removal.
1. Formwork, Staging & Shuttering Inspection (Pre-Pour Checks)
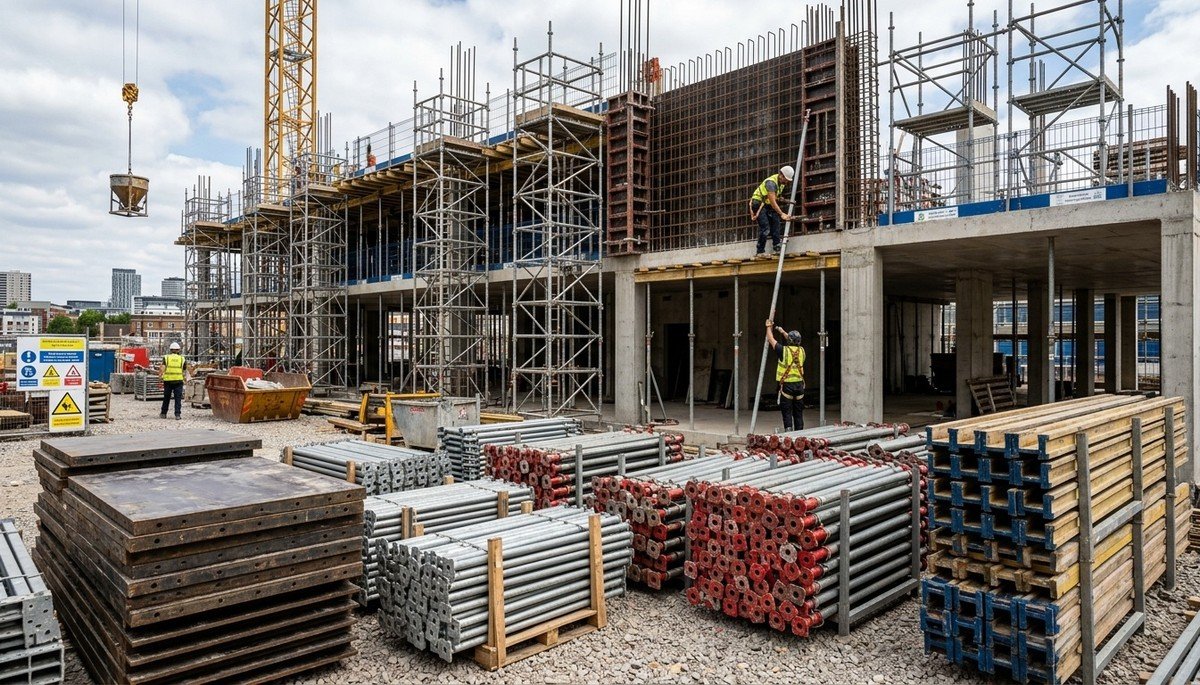
The shuttering staging carries immense hydraulic and dynamic loads during casting: wet concrete weighs approximately 2,400 to 2,500 kg per cubic metre (nearly 2.5 tonnes/m³), plus the dynamic weight of workers, vibrators, and concrete pumps. If the temporary staging yields by even 10 mm, the roof slab will suffer permanent sag or catastrophic collapse.
Always mandate heavy-duty adjustable steel pipe props (Acrow props) with threaded collars and lock pins. If wooden ballies (eucalyptus poles) must be used on smaller residential sites, they must have a minimum base diameter of 100 mm (4 inches), must be perfectly plumb without bends, and must never be spliced or jointed mid-height.
Under IS 14687, vertical props exceeding 2.5 metres in height must be cross-braced with horizontal steel scaffold pipes (runners) in both orthogonal directions at 1.5 to 1.8-metre vertical intervals. Without lacing, tall vertical props buckle laterally when subjected to pump line surge vibrations.
Never permit contractors to rest vertical props directly on loose soil, compacted earth, or hollow bricks. Props must rest on thick wooden sole plates (minimum 250 × 250 × 50 mm) or continuous steel base channels to distribute point loads and prevent sinking during watering or rain.
Verify deck level with a water tube level or auto-level. Provide an upward pre-camber of 1 in 500 (approx. 5 mm for every 2.5 m span) at mid-span of large beams and slabs (IS 456 Cl. 11.2). Seal all plywood joints with high-adhesion PVC foam tape to prevent cement slurry leakage.
Petty contractors frequently paint shuttering plates with waste motor oil or burnt engine oil ("Kala Tel") because it costs almost nothing. This is a disastrous practice. Waste motor oil leaves a greasy, hydrophobic carbon residue on the concrete surface that destroys the chemical bond between concrete and ceiling plaster. Within 6 to 12 months, the ceiling plaster will sound hollow and detach in heavy chunks. Insist on non-staining chemical form-release emulsions or water-thinned shuttering oils.
2. Formwork Stripping Times (IS 456:2000 Clause 11.3)
Stripping shuttering props too early is the single most common cause of premature deflection cracks and ceiling sag. Concrete gains compressive strength gradually. Under IS 456:2000 Clause 11.3.1, formwork must never be struck until concrete has achieved at least twice the stress to which it will be subjected upon de-shuttering:
| Structural Member / Formwork Element | Minimum Period (OPC 43/53) | Minimum Period (PPC / Fly Ash) | IS 456:2000 Reference |
|---|---|---|---|
| Vertical formwork to columns, walls, beams | 16 – 24 hours | 24 – 36 hours | IS 456:2000 Cl. 11.3.1 (a) |
| Soffit formwork to slabs (props to be refixed immediately) | 3 days | 4 – 5 days | IS 456:2000 Cl. 11.3.1 (b) |
| Soffit formwork to beams (props to be refixed immediately) | 7 days | 10 days | IS 456:2000 Cl. 11.3.1 (c) |
| Props to slabs spanning up to 4.5 metres | 7 days | 10 – 12 days | IS 456:2000 Cl. 11.3.1 (d)(1) |
| Props to slabs spanning over 4.5 metres | 14 days | 18 – 21 days | IS 456:2000 Cl. 11.3.1 (d)(2) |
| Props to beams & arches spanning up to 6 metres | 14 days | 18 – 21 days | IS 456:2000 Cl. 11.3.1 (e)(1) |
| Props to beams & arches spanning over 6 metres / cantilevers | 21 days | 28 days | IS 456:2000 Cl. 11.3.1 (e)(2) |
3. Rebar Reinforcement & Cover Block Placement
A concrete slab resists compressive forces at the top face, while high-strength deformed TMT steel bars (Fe 500D under IS 1786) resist tensile forces at the bottom face. If steel rebar is not positioned at its exact design elevation, the structural capacity drops exponentially.
| Structural Member | Mandatory Clear Cover | Recommended Spacing | Failure Risk If Ignored |
|---|---|---|---|
| Roof Slab Bottom Reinforcement | 15 mm – 20 mm | Every 1 metre in a grid (1 block / m²) | Spalling plaster, moisture seepage, ceiling rebar rust |
| Beams (Bottom and Side Faces) | 25 mm – 30 mm | Every 0.8 metre along beam length | Honeycombing, exposed stirrup legs, shear failure |
| Columns (Main Longitudinal Bars) | 40 mm | Every 1 metre vertically on all 4 faces | Carbonation attack, column buckling, rebar bursting |
| Cantilever Chajja / Balcony Slabs | 20 mm top & bottom | Heavy chair bars every 600 mm | Immediate downward collapse or severe tip deflection |
One-Way vs Two-Way Slab Rebar Orientation
In a two-way slab (longer span / shorter span ≤ 2), bending moments occur in both directions. The main reinforcement along the shorter span must ALWAYS be placed below the longer span bars at the bottom mesh so that it retains the maximum effective structural depth (d).
Chair Bars ("Kursi") for Top Negative Steel
Negative moments create tension at the top of the slab over continuous beam supports and in cantilever balconies. Fabricate rigid Z-shaped chair bars from 10 mm TMT scrap steel and space them every 600 mm to 800 mm. Without chair bars, labour walking on the deck will flatten the top mesh down to the bottom, causing cantilever failure!
4. Electrical Conduits & Fan Box Precautions (Pre-Pour Checks)
Electrical conduit installation is where most structural integrity is quietly compromised on residential sites. Electricians who lack structural knowledge routinely lay pipes in clusters or chisel rebar cages to accommodate fan boxes.
The Mandatory 25 mm Spacing Rule
Never allow electricians to bundle 3 or 4 PVC pipes together side-by-side. Bunched pipes prevent concrete aggregate from flowing underneath, creating a hollow horizontal void along the conduit trajectory that cracks under load. Maintain at least 25 mm gap between parallel pipes.
Heavy-Duty Rigid FR PVC Conduits Only
Always insist on Medium-Gauge or Heavy-Gauge Flame Retardant (FR) PVC conduits (IS 9537). Never use cheap flexible ribbed corrugated pipes for slab embedment—they collapse flat when trampled by concrete barrows, making it impossible to pull wires later.
Tie Fan Boxes Rigidly with Wire & Stuff with Paper
Fan hooks must be fabricated from 12 mm MS rod, anchored beneath top steel bars, and wired securely to prevent displacement during vibration. Fan junction boxes must be firmly stuffed with waste cement bags or thermocol to stop wet slurry from filling the box.
Never Route Plumbing Pipes Through Beams
Never allow plumbers to chop through beam stirrups or longitudinal bars. If drainage or AC conduit penetrations are required, insert rigid PVC pipe sleeves in the middle third of the beam depth (near the neutral axis) before pouring.
5. Concrete Mix Specification: M20 vs M25 & Water-Cement Ratio
The quality of your roof slab depends directly on its concrete mix density. Adding excessive water to make concrete easier to spread with a trowel is the single biggest crime committed on Indian building sites.
| Technical Parameter | M20 Concrete Grade | M25 Concrete Grade (Recommended) | IS 456 Reference |
|---|---|---|---|
| Minimum Recommended Grade | M20 (Nominal 1:1.5:3) | M25 (Design Mix / 1:1:2) | IS 456 Cl. 6.1 & Table 5 |
| Characteristic Compressive Strength (28 Days) | 20 N/mm² (MPa) | 25 N/mm² (MPa) | IS 516 compressive testing |
| 7-Day Minimum Compressive Strength | ≥ 13.5 N/mm² (67%) | ≥ 17.0 N/mm² (68%) | Formwork stripping readiness |
| Maximum Water-Cement (W/C) Ratio | 0.50 (Moderate exposure) | 0.45 (Severe exposure) | IS 456 Table 5 durability |
| Minimum Cement Content per m³ | 300 kg (6.0 bags) | 320 kg (6.4 bags) | IS 456 Table 5 |
| Recommended Slump at Pouring Point | 75 mm – 100 mm (Pump: 100–125 mm) | 100 mm – 130 mm (with superplasticizer) | IS 1199 workability test |
Under Abrams' Law of concrete strength, adding just 5 extra litres of water per 50 kg cement bag reduces concrete compressive strength by 25% and increases porosity by over 40%. For manual site mixes, maintain water at 25 to 27 litres per bag (W/C ≤ 0.50). Always incorporate an integral liquid waterproofing admixture (IS 2645, e.g. Dr. Fixit LW+ or Sika Plastocrete Plus at 200 ml per bag) into the gauging water to close capillary pores.
6. On-Site Slump Testing & Cube Sampling Protocol (IS 1199 & IS 516)
Never accept Ready-Mix Concrete (RMC) transit mixers or site-batched concrete on trust alone. Two fast, inexpensive on-site tests confirm workability and design compressive strength:
Fill the standard 300 mm slump cone in 4 equal layers, tamping each layer 25 times with a 16 mm bullet-nosed rod. For chute/barrow pouring, the slump should measure 75 mm to 100 mm. For concrete pumps, target 100 mm to 130 mm achieved through superplasticizers—never by dumping extra tap water into the transit mixer drum.
Cast at least 6 standard test cubes (150 × 150 × 150 mm) for every 15 to 20 m³ of slab concrete poured. Submerge cubes in the same curing water pond. Test 3 cubes at 7 days (must achieve ≥ 67% of 28-day target strength) to verify formwork stripping readiness, and 3 cubes at 28 days for certified structural compliance.
7. Pouring Technique & Needle Vibrator Handling
Even premium M25 concrete will honeycombing and leak if vibrated improperly. Compaction removes entrapped air pockets, but misuse of a mechanical needle vibrator creates severe structural segregation:
Always Insert the Needle Vertically
Insert the 40 mm or 60 mm needle poker vertically into the wet concrete at 400 mm to 500 mm centres. Hold it stationary for 10 to 15 seconds until the surface glistens and large air bubbles stop emerging, then withdraw it slowly at 75 mm/second.
Never Drag the Needle Horizontally
Labourers love to drag the vibrator needle horizontally through the slab to push concrete across long distances. This causes severe segregation: heavy stone aggregate stays behind, while watery cement slurry surges forward, creating weak zones that develop map cracking.
Never Touch Reinforcement Bars with the Vibrator
Directly vibrating rebar shakes steel cages that are embedded in already-setting adjacent concrete. This permanently destroys the micro-bond between steel and concrete, drastically reducing structural load capacity.
Always Have a Backup Vibrator & Extra Fuel on Site
A mechanical breakdown during an active concrete pour is a major site disaster that forces cold joint creation. Always keep a second standby mechanical vibrator (with needle and petrol engine) primed and ready before starting the pour.
8. Continuous 14–21 Day Pond Curing Schedule
Concrete does not harden by "drying out"; it hardens through an exothermic chemical reaction called hydration between cement particles and water. If water evaporates prematurely, hydration halts abruptly, leaving unhydrated cement particles, microscopic pores, and low strength.
As soon as the concrete surface takes its initial set (typically 3 to 4 hours in warm weather), cover the entire slab with wet hessian cloth or burlap gunny bags. Sprinkle water continuously using a fine mist nozzle to prevent surface dry-out and plastic shrinkage cracking.
Construct 50 mm (2-inch) high lean cement mortar bunds (1:8 mix) dividing the slab into 2m × 2m or 3m × 3m ponds (kiari). Submerge the entire roof deck with minimum 50 mm standing clean water. Maintain continuous submergence for at least 14 days for OPC and 21 days for PPC.
9. Diagnosing & Preventing Early Slab Cracks
Not all cracks are structural failures. Here is how civil engineers categorize cracks appearing within the first 30 days of casting:
Appearance: Shallow, diagonal, alligator-skin fissures. Root Cause: High wind or intense heat evaporating surface water faster than bleed water can rise. Remedy: Immediate wet hessian covering and mist spraying; reworn trowel floating before initial set.
Appearance: Straight parallel lines directly mirroring the top rebar grid. Root Cause: Excessively wet mix (slump > 150mm) settling around rigid top rebar bars. Remedy: Restrict W/C ratio to ≤ 0.50 and re-vibrate top concrete 30 minutes after initial pour.
Appearance: Transverse cracks on the underside at mid-span, or diagonal 45° cracks near column faces. Root Cause: Premature props de-shuttering or insufficient bottom tension steel. Remedy: Immediate re-propping and structural epoxy injection / carbon fibre wrapping under structural engineer supervision.
10. Worked Material Estimate: 1,000 Sq Ft Roof Slab (125 mm / 5-Inch Thickness)
For a standard 1,000 sq ft residential roof deck with 125 mm (5-inch) slab thickness and standard interconnected beam ribs (9 × 15 inches), here is the practical material consumption based on M20 and M25 mix ratios:
- Slab Deck Volume: 1,000 sq ft × 0.416 ft = 416 cft
- Beam Ribs Volume (Net below slab): ~100 cft
- Total Wet Concrete Volume: ~516 cft = 14.6 cubic metres
- Total Shuttering Area: ~1,250 sq ft (including beam sides)
11. Printable 28-Point Master Site Inspection Checklist
Use this comprehensive printable checklist to inspect the site at each distinct phase. Do not permit concrete pouring to start until every pre-pour box is signed off:
PHASE APre-Pour Shuttering & Rebar Inspection (12 Critical Checks)
- ☐ 1. Verify vertical props are plumb and rested on thick timber sole plates, not loose soil.
- ☐ 2. Verify horizontal runner lacing is installed at 1.5–1.8m vertical intervals on all props.
- ☐ 3. Confirm 1 in 500 upward camber at mid-span of all long-span beams and slabs.
- ☐ 4. Ensure non-staining chemical shuttering oil is applied; zero burnt motor oil on site.
- ☐ 5. Seal all shuttering plywood gaps with PVC foam tape to prevent slurry leaks.
- ☐ 6. Verify main shorter-span rebar is placed at the bottom-most layer in two-way slabs.
- ☐ 7. Check 50d tension lap lengths, staggered by at least 1.3 times the lap length.
- ☐ 8. Install 15–20 mm factory concrete cover blocks at 1 block per square metre.
- ☐ 9. Install 10 mm Z-shaped chair bars every 600–800 mm to maintain top mesh elevation.
- ☐ 10. Verify electrical PVC conduits are spaced with minimum 25 mm clearance between pipes.
- ☐ 11. Fan boxes wired securely to steel and packed tightly with paper to block slurry.
- ☐ 12. Thoroughly blow out wood dust, wire clippings, and debris with water or air jet.
PHASE BPouring Day Supervision (9 Active Checks)
- ☐ 13. Test on-site slump (75–100 mm for chute, 100–125 mm for pump) before unloading.
- ☐ 14. Cast 6 concrete test cubes (150 mm) for every 15–20 m³ of concrete poured.
- ☐ 15. Ensure liquid waterproofing admixture (200 ml/bag) is pre-mixed into gauging water.
- ☐ 16. Verify standby needle vibrator and backup petrol engine are tested on site.
- ☐ 17. Insert vibrator needle vertically at 400–500 mm centres for 10–15 seconds; never drag horizontally.
- ☐ 18. Never vibrate already-set concrete or reinforcement cages directly.
- ☐ 19. Pour beams first, followed immediately by monolithic slab deck pouring.
- ☐ 20. Check slab thickness continuously with a pre-marked rebar dipstick gauge.
- ☐ 21. Station a dedicated carpenter below the deck to monitor props and tighten loose wedges.
PHASE CFinishing, Curing & De-Shuttering (7 Final Checks)
- ☐ 22. Finish surface with wooden float to achieve uniform texture for waterproofing bond.
- ☐ 23. Cover with wet hessian cloth within 3 to 4 hours of pour to stop surface shrinkage cracks.
- ☐ 24. Build 50 mm mortar bunds (kiari) on Day 2 and submerge entire deck under 50 mm water.
- ☐ 25. Maintain continuous pond curing for 14 days minimum (OPC) or 21 days (PPC).
- ☐ 26. Maintain props to slabs up to 4.5m for 7 days minimum, slabs over 4.5m for 14 days minimum.
- ☐ 27. Maintain cantilever chajja and balcony props for full 21 to 28 days.
- ☐ 28. Conduct 7-day and 28-day laboratory cube crushing tests and archive reports.
Need Structural Engineering Supervision in Haryana or Punjab?
Vision Infra executes turnkey civil frameworks, multi-storey RCC structural casting, and industrial concrete projects across Ambala, Yamunanagar, Kurukshetra, Panchkula, and surrounding areas. Speak with our chief project engineer or consult on WhatsApp for site-specific shuttering, rebar, or RMC mix design guidance.
Frequently Asked Questions
Q1What is the minimum concrete grade for an RCC roof slab under IS 456?
IS 456:2000 specifies M20 as the absolute minimum concrete grade for reinforced cement concrete (RCC) under mild and moderate exposure conditions. For roofs exposed to intense rainfall, coastal air, or heavy thermal cycles, civil structural engineers strongly recommend M25 concrete (minimum characteristic compressive strength of 25 N/mm² at 28 days) with a maximum water-cement ratio of 0.45 and minimum cement content of 320 kg/m³.
Q2When should slab shuttering and props be removed according to IS 456?
Under IS 456:2000 Clause 11.3, vertical shuttering to beam sides and walls can be stripped after 16 to 24 hours. Slab soffit boards can be removed after 3 days provided vertical props are refixed immediately. Props supporting slabs spanning up to 4.5 metres must remain for 7 days (OPC) or 10 days (PPC). For slabs spanning over 4.5 metres, props must remain in place for a minimum of 14 days. Cantilever beams and chajjas require props to remain for 21 to 28 days.
Q3What is the correct cover block size for an RCC roof slab?
The clear concrete cover for an RCC roof slab must be 15 mm to 20 mm (typically 20 mm for residential roof decks). Never use broken brickbats, stone pieces, or wooden chips as makeshift cover blocks. Use factory-moulded polymer-fibre concrete cover blocks (grade M25 or higher) with binding wire ties, spaced at 1 block per square metre in a regular grid.
Q4How long should an RCC roof slab be cured with water?
Continuous pond curing with a standing water depth of 50 mm (2 inches) must be maintained for at least 14 days when Ordinary Portland Cement (OPC 43/53) is used, and a minimum of 21 days when Portland Pozzolana Cement (PPC) or fly-ash blended cement is used. In dry summer months with ambient temperatures exceeding 35°C, premature dry-out causes plastic shrinkage micro-cracks that permanently compromise waterproofing.
Q5Why do cracks appear on a roof slab within 24 hours of casting?
Cracks appearing within 2 to 24 hours are usually plastic shrinkage or plastic settlement cracks. Common causes include: (1) excessive water added to the concrete mix (W/C ratio > 0.55), (2) dry shuttering ply absorbing water from concrete, (3) high wind and dry heat causing rapid surface evaporation before setting, (4) over-vibrating with a needle vibrator causing slurry bleeding, or (5) loose wooden props settling under concrete weight.
Q6Can electrical conduits be bundled together inside the roof slab?
No. Bundling 3 or 4 PVC conduits together creates a continuous horizontal void line inside the concrete, resulting in structural shear cracks along the pipe trajectory. Electrical conduits must be laid with a minimum 25 mm gap between parallel pipes, secured to bottom reinforcement with binding wire, and routed through the middle third of the slab depth rather than bunched near the top tension zone.
Q7What is the purpose of chair bars (kursi) in slab reinforcement?
Chair bars (kursi) are Z-shaped or inverted U-shaped bent rebar supports that hold the top reinforcement mesh (negative moment steel over beams and cranked bars) at its exact design elevation. Without sturdy chair bars spaced at 600 mm to 900 mm centres, workers and concrete barrows walking over the deck will trample the top steel down to the bottom, causing severe structural cracking and potential collapse of balcony cantilevers.
Q8Why is burnt engine oil (kala tel) dangerous for slab shuttering?
Using waste motor oil or burnt engine oil leaves a sticky, hydrophobic carbon sludge on the underside of the concrete slab. This chemically prevents ceiling plaster, gypsum coats, and putty from bonding, leading to hollow ceiling sounds and falling plaster within 6 to 12 months. Always insist on certified chemical form-release oils or mineral shuttering emulsions.
Verified Industry Sources & Standards:

Sushil Kumar
Verified AuthorManaging Director & Founder • Vision Infra
Founder of Vision Infra, overseeing turnkey civil engineering, high-rise residential frameworks, road networks, and industrial infrastructure across Haryana & Punjab. Expert in structural costing, IS code compliance, and BOQ estimation.
Need Residential Structural & Slab Casting for Your Site?
Specialised RCC structural framing, shuttering, and concrete casting compliance adhering strictly to IS 456 standards. Backed by our 100% self-owned machinery fleet and proven delivery at Mahira Green-2 Residential Tower.
Related Engineering Guides
 Costing & Budgeting
1000 Sq Ft House Foundation Cost in India 2026: Complete Guide
1000 sq ft house foundation cost in India 2026: rates by foundation type, item-wise breakdown, quantities, soil effects and tips to save without risk.
 Costing & Budgeting
RCC Roof vs Metal Roof Cost for a 1,000 Sq Ft House in India (2026)
RCC roof costs ₹4.3–6 lakh and a metal roof ₹2.6–3.8 lakh for 1,000 sq ft in 2026. Compare cost, lifespan, heat, noise, and upkeep before you build.
 Costing & Budgeting
Waterproofing Cost Per Sq Ft in India (2026): Terrace, Bathroom and Basement Rates
Waterproofing cost per sq ft in India 2026: terrace ₹60–250, bathroom ₹40–200, basement ₹120–300. Explore methods, chemical prices, worked examples and contractor tips.